Module 1 was the mental model. This is where the tools come off the shelf. You'll install VS Code, sign in to Claude, download the AI OS Blueprint, initialise Git, and run your first /prime. 30 to 60 minutes, end to end. Everything in Modules 2 through 4 builds on this setup. Get it right once and you don't touch it again.
Step 1: Install VS Code and Claude Code
VS Code is the app everything runs inside. It's free, made by Microsoft, and used by most professional developers. The Claude Code extension is what gives it the AI brain. That combination is your workspace for everything that follows. Install VS Code:
- Go to code.visualstudio.com
- Click the big Download button (it auto-detects Mac or Windows)
- Install it like any other app
- Open it once to make sure it works
Install the Claude Code extension:
- Open VS Code
- Click the Extensions icon in the left sidebar (looks like 4 squares)
- Search for "Claude Code" by Anthropic
- Click Install
- You'll see a Claude icon appear in your left sidebar
Step 2: Sign Up for Claude
You need a Claude account with a Pro or Max subscription to use Claude Code.
- Go to claude.ai and create an account if you don't have one
- Subscribe to Claude Pro ($20/month) or Claude Max ($100/month or $200/month)
Pro gives you solid usage. Max gives you far more. If you're going to be building heavily, Max is worth it. You may have used Claude web or the Claude Desktop app before. They're fine for quick chats. For everything in this guide, you'll work in VS Code + Claude Code.
Step 3: Connect Claude Code to Your Account
- Open Claude Code (the Claude icon in VS Code's left sidebar)
- Click Sign In. This opens your browser.
- Log in with your Claude account
- Approve the connection
- You should see a chat interface ready to go
Step 4: Download the AI OS Blueprint
Your AI OS Blueprint is personalised to you - built from your intake form responses. It is for your use only and cannot be shared or resold.
📦 We sent your Blueprint zip file via email or Slack. Check your inbox or DMs. If you haven't received it yet, reach out to us and we'll send it over.
- Unzip it. You'll get a folder called
ai-os-blueprint
- Move this folder somewhere sensible on your computer. Your Desktop or a dedicated projects folder works fine.
- Rename it to something meaningful if you want - like
my-ai-os or [your-company]-os. The name doesn't matter technically, but it's your system.
Step 5: Open the Blueprint in VS Code
- Open VS Code
- Go to File > Open Folder
- Navigate to your
ai-os-blueprint folder and select it
- You should see the full file tree in the left sidebar
📁 You should see:
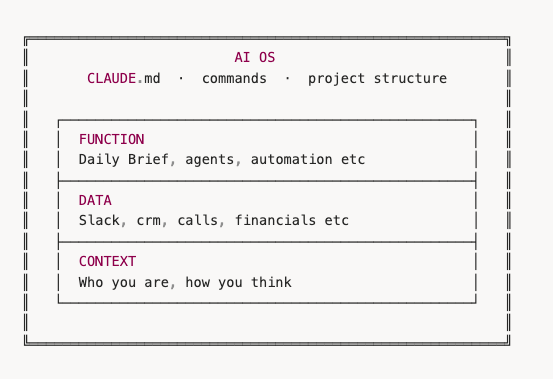
CLAUDE.md (the brain)context/ folder (6 files)reference/ folder (architecture, autonomy ladder, decision engine, and data/integrations patterns)scripts/ folderdata/, plans/, outputs/ folders.claude/ folder (commands and skills)
If you see all of this, you're in the right place.
Step 6: Turn On Auto-Approve Permissions
By default, Claude asks for permission before every file read, every file write, every command. That's fine if you're cautious, but it creates a lot of friction when you're building. Auto-approve lets Claude read and write files in your project without stopping to check.
- Click the Claude icon in the left sidebar to open Claude Code
- In the Claude Code panel, paste the following:
💬 Prompt: Please enable auto-approve for all tools in this project so you can read and write files without asking each time.
Claude will walk you through enabling the right settings.
⚠️ Claude will be able to read and write files in your project without asking each time. This is safe. It can only access files inside your project folder. It's not touching anything else on your computer.
Optional: Dangerously Bypass Permissions (advanced)
This is a deeper version of auto-approve that removes every remaining confirmation, including commands, terminal operations, and file moves. The upside is zero friction while building. The downside is you're fully trusting Claude to do what you told it to do inside your project.
You assume all the risk. Claude can't touch anything outside your project folder, but inside it, it acts freely. If you've told Claude to build something, it builds without checking in.
This is the preferred workflow once you're comfortable. If you'd rather stay on standard auto-approve, skip this and come back later.
To enable it, paste this into the Claude Code panel:
💬 Prompt: Enable the dangerously skip permissions mode for this project. I've read the risks, I understand Claude can read, write, and run anything inside the project folder without confirmation, and I want zero-friction building from here.
Claude will walk you through the setup and confirm before it's live.
Step 7: Initialise Git
What Git is: Git is a version-control system. Every change you save to your project gets tracked. If something breaks, you can roll back to any previous version in seconds. GitHub is a separate thing - a website where you can push your Git project to the cloud as a backup or to share it. Right now, we're just initialising Git locally on your machine.
Why you're doing it: Claude Code is about to write and edit a lot of files as you build. Git gives you an undo button that reaches back forever. If a session goes sideways, you can recover. Module 3 also uses Git when we set up your scheduled workflows on GitHub Actions, so having it in place now means no rework later.
In the Claude Code panel, paste:
💬 Prompt: Initialise git for this project and make an initial commit with all files.
If Claude says "already initialised", that's fine. It just means the Blueprint already had Git set up.
Step 8: Run /prime
What /prime is: Every time you open a new Claude Code session, the AI starts with zero memory of your project. It doesn't know who you are, what you're building, or what you've discussed before. /prime is a command we baked into your Blueprint that loads all your context files and reference docs before the conversation starts, so the AI already knows who you are and what you're building by the time you type your first real message.
Why you're doing it now: To confirm the Blueprint works end to end and see what /prime reports. Virtual Assistants Philippines already prebuilt your context files from your intake form, so the AI should already know who you are and what your business does.
In the Claude Code panel, paste:
💬 Prompt: /prime
Claude reads your entire project and tells you where you stand. Because Virtual Assistants Philippines prebuilt your context from your intake form, /prime should already recognise your business. You'll run /prime at the start of almost every session from here on.
Quick Reference: Commands
| Command | What It Does | When to Use |
|---|
| /prime | Loads all context and reports system status | Start of every session |
| /decide | Log a business decision to train the system | Any significant decision |
| /create-plan | Design an implementation plan before building | Before adding anything significant |
| /implement | Execute a plan step by step | After approving a plan |
Troubleshooting
When something doesn't work, expand the matching problem below.
Claude Code isn't showing up in VS Code
Make sure you installed the Claude Code extension (by Anthropic) from the Extensions marketplace. Restart VS Code after installing.
Claude says "not signed in" or won't connect
Click the Claude icon > Sign In. Make sure you have an active Claude Pro or Max subscription. Try signing out and back in if it's stuck.
You can't see the file tree or project files
Make sure you opened the folder (File > Open Folder), not an individual file. You should see CLAUDE.md at the root level.
/prime isn't working
Make sure you're typing the command in the Claude Code panel, not the regular VS Code terminal. Click the Claude icon in the sidebar first.
Claude's asking for permission on every action
Turn on auto-approve in Claude Code settings (see the Turn On Auto-Approve step above). This lets Claude read and write files without asking each time.
You made a mistake and want to undo
Git tracks everything. Tell Claude "undo the last change to [file]" and it'll handle it. Or in the VS Code terminal, type git diff to see what changed, or git checkout -- filename to undo changes to a specific file.